ge combo washer dryer manual

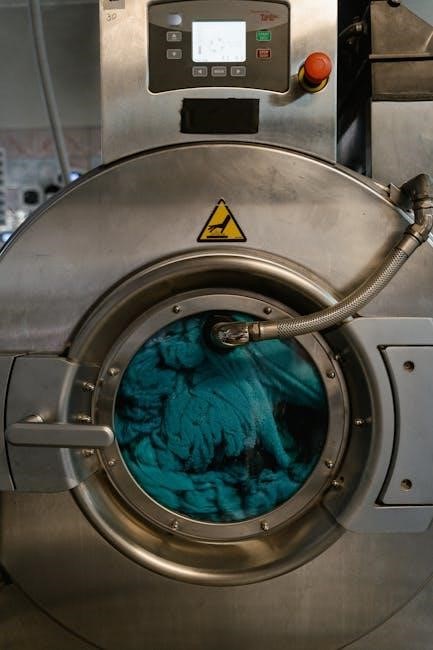
The GE Combo Washer Dryer is an innovative, space-saving appliance combining a washer and dryer in one unit. Designed for convenience, it offers efficient cleaning, energy-saving features, and quiet operation, making it ideal for modern households seeking streamlined laundry solutions.

1.1 Key Features and Benefits

The GE Combo Washer Dryer offers a space-saving design, combining washing and drying functions in one unit. It features multiple wash and dry cycles, adjustable temperature controls, and a delay start option for added convenience. With energy-efficient operation and quiet performance, it provides a practical solution for laundry needs while maintaining fabric care and hygiene.

1.2 Safety Precautions and Warnings

Read all instructions carefully to minimize risks of fire, electric shock, or injury. Ensure the unit is properly leveled and stable. Use only GE-approved parts and follow fabric care guidelines. Never operate the dryer without the lint filter. Keep the area around the appliance clear of flammable materials and ensure proper ventilation for safe operation.

Understanding the Controls and Cycles

The GE Combo Washer Dryer features intuitive controls with rotary knobs and a digital display. It offers multiple wash and dry cycles, including Timed Dry and Auto options, allowing users to customize settings for optimal cleaning and efficiency.

2.1 Wash Cycles and Options

The GE Combo Washer Dryer offers various wash cycles, including Heavy Duty, Normal, and Delicates, catering to different fabric types and soil levels. Soil Level and Temperature Adjustments allow customization, while Delay Start enables scheduled washing. These options ensure efficient cleaning and gentle fabric care, making it easy to handle diverse laundry needs effectively.

2.2 Dry Cycles and Options

The GE Combo Washer Dryer features multiple drying cycles, including Timed Dry and Auto Dry, which automatically adjusts based on moisture levels. Additional options like Extra Dry and Delicates ensure optimal drying for various fabrics. The unit also offers energy-efficient settings and noise reduction, making it versatile for different laundry needs while maintaining fabric care and performance.

2.3 Special Features (Delay Start, Soil Level, Temperature Adjustments)

The GE Combo Washer Dryer includes advanced features like Delay Start, allowing users to schedule cycles up to 24 hours in advance. Soil Level adjusts wash time for different loads, while Temperature Adjustments offer precise control. These features enhance cleaning efficiency and fabric protection, ensuring tailored care for every laundry load with ease and convenience.

Loading the Washer-Dryer Combo

Sort clothes by color, fabric type, and soil level before loading. Avoid overloading to ensure proper air circulation and optimal cleaning efficiency;

3.1 Sorting and Loading Tips

Sort clothes by color, fabric type, and soil level to prevent damage and ensure optimal cleaning. Separate delicates from heavier items and avoid overloading. For best results, fill the drum 2/3 full, allowing space for air circulation and proper tumbling. This helps maintain fabric integrity and ensures efficient washing and drying performance.

3.2 Maximum Load Capacity and Guidelines

The GE Combo Washer Dryer has a maximum load capacity of 3.8 cu. ft. for washing and 5.9 cu. ft. for drying. To ensure optimal performance, do not overload the drum beyond 2/3 full to allow proper air circulation. Always check fabric care labels to confirm suitability for washing and drying in the combo unit. Proper loading prevents damage and ensures efficient cleaning.

Installation and Setup

Proper installation ensures optimal performance. Ensure the unit is leveled, legs adjusted, and electrical connections meet requirements (120 volts, 24 amps). Refer to the manual for detailed setup instructions.

4.1 Electrical Requirements

The GE Combo Washer Dryer requires a 120-volt, 24-amp electrical supply. Ensure it’s plugged into a grounded, 3-prong outlet to prevent electrical shock. Avoid using extension cords and always follow the manual’s wiring guidelines for safe installation and operation.

4.2 Leveling and Venting Instructions

Ensure the unit is properly leveled using adjustable legs for stability. Uneven surfaces can cause vibration and poor performance. For vented models, install the venting system according to manual guidelines to prevent moisture buildup. Always follow manufacturer recommendations to maintain efficiency and safety.

Maintenance and Cleaning

Regularly clean the lint filter and drain pump to ensure optimal performance. Check for blockages and wipe the drum to prevent residue buildup. Maintain your appliance for longevity.

5.1 Cleaning the Lint Filter and Drain Pump

Regularly clean the lint filter after each use to improve airflow and prevent fires. Remove and rinse the filter with water to eliminate debris. For the drain pump, locate it at the bottom and clean it every 1-2 months. Remove the pump filter, rinse it thoroughly, and ensure it’s securely replaced. This maintains optimal performance and prevents blockages.

5.2 Checking for Blockages

Regularly inspect the drain pump and hoses for blockages to ensure proper water flow. Check the drain hose for kinks or bends and verify venting is clear. Clean the pump filter and surrounding areas to prevent debris buildup. Ensure the gasket and detergent dispenser are free from residue. Regular inspection helps maintain performance and prevents issues like poor drainage or odors.

Troubleshooting Common Issues

Address common issues by redistributing unbalanced loads, cleaning the pump filter, and ensuring proper drainage. Check for blockages and ensure the unit is level for optimal performance.

6.1 Poor Wash or Dry Performance

Poor performance may result from overloaded drums, improper sorting, or clogged filters. Ensure loads are balanced, redistribute clothes, and clean the lint filter and drain pump regularly. Check detergent dosage and fabric softener usage, as excess can reduce efficiency. Verify water supply and drainage connections are unobstructed for optimal wash and dry cycles. Regular maintenance ensures consistent performance.

6.2 Noise or Vibration Problems

Noise or vibration issues often stem from improper installation or unbalanced loads. Ensure the unit is leveled correctly and placed on a solid floor. Redistribute clothes if loads are uneven. Check for loose items in pockets and verify the pump filter isn’t clogged. Excessive vibration may indicate overloaded drums or improper leveling. Refer to the manual for troubleshooting steps or contact GE support for assistance.

Energy Efficiency and Cost Savings

The GE Combo Washer Dryer features ENERGY STAR certification, high-efficiency wash cycles, and ventless heat pump drying, reducing water and electricity consumption while lowering utility bills.

7.1 Energy Star Certification

The GE Combo Washer Dryer is ENERGY STAR certified, ensuring it meets rigorous energy efficiency standards set by the U.S. Environmental Protection Agency. This certification confirms that the appliance uses less water and energy than standard models, helping reduce utility bills and environmental impact. ENERGY STAR compliance also highlights its eco-friendly design, making it a sustainable choice for homeowners.

7.2 Water and Energy Consumption

The GE Combo Washer Dryer is designed to optimize water and energy usage. It features adaptive sensors that adjust water levels based on load size and soil level. The unit consumes significantly less water and energy compared to traditional models, with cycles tailored to minimize resource use while maintaining performance. This eco-friendly design helps reduce utility bills and environmental impact.

Special Care for Fabrics

The GE Combo Washer Dryer offers gentle cycles for delicate fabrics, ensuring minimal wear. Separate synthetic and woolen items to prevent damage, and use specific settings for hand-washable garments to maintain their quality and texture.

8.1 Delicates and Hand-Washable Items

For delicate fabrics, use the Gentle Wash cycle with cold water. Place hand-washable items in a mesh laundry bag to protect them from damage. Avoid overloading to ensure gentle tumbling. Follow fabric care labels and remove promptly after washing to prevent creasing. This ensures your delicate items remain intact and maintain their softness and texture.

8.2 Drying Synthetic and Woolen Fabrics

For synthetic fabrics, use the Timed Dry cycle on low heat to prevent overheating. Woolens should be dried on a low-temperature setting to avoid shrinkage. Remove woolen items promptly after drying to prevent creasing. Always follow fabric care labels for specific instructions to maintain texture and integrity of your garments.

Warranty and Customer Support

GE Appliances offers a limited warranty covering parts and labor for defective components. For support, visit the GE Appliances website or call 800.GE.CARES for assistance.

9.1 Warranty Period and Coverage

The GE Combo Washer Dryer is backed by a limited warranty covering parts and labor for defective components. The warranty extends to the original purchaser and subsequent owners for products used in home environments. Coverage varies by model, ensuring repairs are performed by authorized service providers. Specific details, including duration and terms, are outlined in the product manual.

9.2 Contacting GE Appliances Support

For assistance with your GE Combo Washer Dryer, contact GE Appliances Support at 800.GE.CARES (800.432.2737) or visit their website at GEAppliances.com. In Canada, call 800.561.3344 or visit GEAppliances.ca for support. Their team is available to address questions, troubleshooting, and service needs, ensuring your appliance operates efficiently and effectively.

Regular maintenance, proper loading, and adhering to guidelines ensure optimal performance. Follow the manual for efficiency, longevity, and safety, maximizing your GE Combo Washer Dryer experience effectively always.

10.1 Maximizing Appliance Performance

For optimal performance, clean the lint filter and pump regularly, ensure balanced loads, and use HE detergent. Proper sorting and correct cycle selection prevent damage and extend lifespan, while adhering to maintenance tips enhances efficiency and reliability, ensuring your GE Combo Washer Dryer operates effectively for years to come with consistent results.

10.2 Importance of Following the Manual

Following the manual ensures safe and efficient operation, prevents damage, and prolongs appliance lifespan. It provides guidance on proper usage, maintenance, and troubleshooting, while also outlining warranty terms and conditions. Adhering to instructions helps avoid potential hazards and ensures optimal performance, making it essential for both user safety and appliance longevity.

Continue Reading

canon pixma mx490 user manual

Overview of the Canon Pixma MX490 User Manual

The Canon Pixma MX490 User Manual is a comprehensive guide providing key features‚ technical specifications‚ and compatibility details.
It offers an overview of basic operations‚ advanced functions‚ and troubleshooting options‚ ensuring efficient use of the printer.

1.1 Key Features of the Canon Pixma MX490

The Canon Pixma MX490 is a wireless all-in-one printer designed for home and small office use. Key features include mobile printing via AirPrint and Android Print‚ wireless connectivity‚ and a built-in fax machine. It also offers a compact design‚ high-resolution printing up to 4800 x 1200 dpi‚ and cloud printing capabilities. The printer supports automatic document feeding and features an intuitive LCD screen for easy navigation. Its ink efficiency and compatibility with multiple operating systems make it a versatile choice for users.

1.2 Technical Specifications

The Canon Pixma MX490 features a print resolution of up to 4800 x 1200 dpi and uses FINE ink cartridges for vibrant output. It supports wireless connectivity (Wi-Fi) and includes a built-in fax modem. The printer has a 100-sheet paper capacity and an automatic document feeder for scanning and copying. It is compatible with Windows and Mac operating systems and supports mobile printing through AirPrint and Android Print. The printer measures 17.2 x 11.0 x 7.5 inches and weighs approximately 13.6 pounds.

1.3 Compatibility with Different Operating Systems

The Canon Pixma MX490 is designed to work seamlessly with various operating systems‚ including Windows (10‚ 8.1‚ 8‚ 7‚ and Vista) and macOS (10.6.8 or later). It also supports mobile printing via AirPrint for iOS devices and Android Print for Android devices. Wireless connectivity ensures easy integration with modern smartphones and tablets. Additionally‚ the printer is compatible with Canon’s PRINT Inkjet/SELPHY app‚ enhancing versatility for mobile users. Drivers and software updates are available on Canon’s official website for optimal performance across all supported platforms.

Installation and Setup Guide

The Canon Pixma MX490 setup involves unboxing‚ connecting to power‚ and installing drivers. Wireless or USB connectivity options are available for seamless installation. User guides and Canon’s official support ensure a smooth setup process.

2.1 Unboxing and Physical Setup

Start by carefully unboxing the Canon Pixma MX490 printer‚ ensuring all components are included. Place the printer on a flat‚ stable surface and connect it to a power source. Install the print head and ink cartridges as instructed. Load the paper tray with compatible paper. Connect the printer to your computer via USB or set up wireless connectivity. Refer to the user manual for detailed unboxing and physical setup steps to ensure proper installation and functionality. This process ensures your printer is ready for operation.

2.2 Software Installation for Windows and Mac

To install the Canon PIXMA MX490 software‚ download the driver from the official Canon website. For Windows‚ run the installer and follow on-screen instructions. On Mac‚ install the CUPS printer driver. Ensure your system meets the compatibility requirements. After installation‚ restart your device and printer to complete the setup. The software enables advanced features and ensures smooth operation. Refer to the user manual for detailed steps and troubleshooting tips if issues arise during installation.

2.3 Wireless Connectivity Setup

To set up wireless connectivity for the Canon PIXMA MX490‚ access the printer’s menu and select the wireless setup option. Choose your network from the list and enter the password. Ensure your router is nearby for a stable connection. The printer will automatically connect to the network. If issues arise‚ refer to the manual for troubleshooting steps. A successful connection enables features like mobile and cloud printing‚ enhancing your printing experience.

Basic Operations and Functions

The Canon PIXMA MX490 offers essential operations like printing‚ copying‚ scanning‚ and faxing. These functions are easily accessible via the printer’s control panel or connected devices‚ ensuring straightforward operation for users.

3.1 Printing: Configuration and Basic Settings

To configure the Canon PIXMA MX490 for printing‚ access the printer settings via the control panel or Canon software. Select the desired paper size‚ print quality‚ and layout options. For wireless printing‚ ensure the printer is connected to your network. Use AirPrint or Android Print for mobile devices. The manual provides step-by-step guidance for troubleshooting common print issues and optimizing print settings for various media types‚ ensuring high-quality output tailored to your needs.

3.2 Copying: How to Use the Copy Function

Using the Canon PIXMA MX490 copy function is straightforward. Load the document on the glass or in the ADF. On the control panel‚ select the Copy option and choose the desired settings‚ such as paper size‚ copy quality‚ and number of copies. For color or black-and-white copies‚ press Start. The printer also supports reducing or enlarging documents and making multiple copies in one go. The manual provides detailed steps for troubleshooting and customizing copy settings to meet your specific needs.

3.3 Scanning: Configuring and Using the Scanner

Configuring and using the scanner on the Canon PIXMA MX490 is simple. Place the document on the glass or in the ADF. Select the Scan option from the control panel and choose your preferred settings‚ such as resolution‚ file format‚ and destination. You can scan directly to a computer‚ email‚ or cloud services. For multiple pages‚ use the ADF. The manual provides guidance on troubleshooting scan issues and optimizing image quality. Ensure the scanner is properly aligned for clear results.

3.4 Faxing: Setting Up and Sending Faxes

Setting up faxing on the Canon PIXMA MX490 involves connecting the printer to a telephone line and configuring fax settings via the control panel. Enter the recipient’s fax number manually or use stored contacts. You can send faxes directly from the printer or attach a cover page. The manual provides guidance on troubleshooting common fax issues‚ such as connection problems or failed transmissions. Ensure the printer is properly configured with your telephone line for reliable faxing. refer to the manual for detailed steps on setting up and using the fax function effectively.

Advanced Features and Settings

The Canon PIXMA MX490 supports mobile printing via AirPrint and Android Print‚ and offers cloud printing through Canon Cloud Link‚ enhancing convenience for modern printing needs.

4.1 Mobile Printing: Using AirPrint and Android Print

The Canon Pixma MX490 supports mobile printing through AirPrint for iOS devices and Android Print for Android devices. These features allow wireless printing of documents‚ photos‚ and more directly from smartphones or tablets. To use these services‚ ensure the printer and mobile device are connected to the same Wi-Fi network. Simply select the printer from your device’s printing options‚ and your files will be sent seamlessly. This convenient feature enhances productivity and flexibility for users on the go.

4.2 Cloud Printing: Canon Cloud Link Overview

The Canon Cloud Link enables users to print and scan documents directly from cloud services like Google Drive‚ Dropbox‚ and OneDrive. This feature allows seamless connectivity between the Canon Pixma MX490 and cloud-based platforms‚ eliminating the need for a computer. Users can access and print files stored online or scan documents and save them to the cloud. The service is accessed via the Canon Inkjet Cloud Printing Center‚ providing a convenient and efficient way to manage documents remotely‚ enhancing productivity and flexibility for home and office use.

Maintenance and Troubleshooting

Maintain your Canon Pixma MX490 by replacing ink cartridges‚ handling paper jams‚ and cleaning the print head. Troubleshoot common issues like error codes and connectivity problems.

5.1 Ink Cartridge Replacement and Maintenance

Ink cartridge replacement for the Canon Pixma MX490 is straightforward. Open the printer‚ lift the top cover‚ and wait for the carriage to stop. Press the tab to release the old cartridge and remove it. Insert the new cartridge‚ ensuring it clicks into place. Close the cover and test the printer. Regularly check ink levels and clean the print head to maintain print quality. Always use genuine Canon cartridges for optimal performance and longevity. Follow the manual’s guidelines for proper handling and disposal of used cartridges.

5.2 Paper Handling and Common Paper Issues

Proper paper handling is essential for the Canon Pixma MX490. Load paper into the tray‚ ensuring it aligns with guides and does not exceed capacity. Use the correct paper type for your print job to avoid jams. Common issues include misaligned sheets or incorrect settings. If a paper jam occurs‚ gently remove the jammed paper from the printer. Clean the paper feed rollers periodically. Always refer to the manual for troubleshooting tips and to resolve paper-related errors. This ensures smooth printing and minimizes downtime. Regular maintenance helps prevent paper handling problems.

5.3 Cleaning and Aligning the Print Head

Cleaning and aligning the print head ensures optimal print quality for the Canon Pixma MX490. Use the automatic cleaning option via the printer or Canon IJ Utility. If manual cleaning is needed‚ dampen a cloth with water‚ gently wipe the print head‚ and let it dry. After cleaning‚ align the print head by printing a test page and scanning it to adjust settings. Regular maintenance prevents clogged nozzles and faded prints. Refer to the manual for detailed steps to avoid errors during the process.

Frequently Asked Questions and Solutions

  • Common issues: Error codes‚ paper jams‚ and connectivity problems.
  • Solutions: Reset the printer‚ check ink levels‚ and ensure proper wireless connections.
  • More help: Visit the Canon support website for detailed troubleshooting guides and FAQs.

6.1 Common Issues and Error Codes

Users often encounter issues like paper jams‚ error codes (e.g.‚ E04‚ E05)‚ and connectivity problems. These errors can usually be resolved by resetting the printer‚ checking ink levels‚ or ensuring stable wireless connections. For detailed solutions‚ refer to the Canon support website or the online manual‚ which provides troubleshooting guides and FAQs to address these common problems effectively.

6.2 Resetting the Printer to Factory Settings

Resetting the Canon Pixma MX490 to factory settings can resolve persistent issues. Press and hold the Stop button for 10 seconds with the printer on. This restores default settings but erases custom configurations. For detailed steps‚ refer to the user manual or Canon’s support site. Ensure all important settings are backed up before performing the reset to avoid losing customized preferences. This process is a last-resort solution for unresolved errors or connectivity problems.

Additional Resources

Visit the official Canon USA website for PIXMA MX490 drivers‚ manuals‚ and support. Access online guides‚ FAQs‚ and troubleshooting resources to maximize your printer’s performance and resolve issues.

7.1 Official Canon Support and Downloads

Canon provides extensive support for the PIXMA MX490 through its official website. Users can download the latest drivers‚ firmware‚ and software to ensure optimal printer performance. The Canon USA portal offers detailed online manuals‚ FAQs‚ and troubleshooting guides to address common issues. Additionally‚ the site includes video tutorials and user guides for advanced features like wireless setup and mobile printing. Visit the official support page for comprehensive resources to enhance your printing experience.

7.2 Online Manual and User Guides

The Canon PIXMA MX490 Online Manual is accessible for free‚ offering detailed instructions on basic functions and advanced features. Users can download the PDF manual for offline reference or view it directly on the Canon website. The manual includes troubleshooting guides‚ wireless setup instructions‚ and tips for optimizing print quality. Additionally‚ Canon provides video tutorials and FAQs to help users navigate all printer functions effortlessly. Visit the official Canon support page to access these resources and ensure seamless operation of your printer.

Continue Reading

schumacher battery charger manual sul code

Welcome to the Schumacher Battery Charger Manual! This guide provides essential information for safe and effective use of your charger. Learn about features‚ operation‚ and troubleshooting‚ including the SUL error code‚ to maintain optimal performance and extend battery life.

1.1 Overview of the Schumacher Battery Charger

The Schumacher Battery Charger is a reliable and advanced device designed to charge‚ maintain‚ and troubleshoot batteries efficiently. It features multiple charging modes‚ including desulfation‚ which helps restore sulfated batteries. The charger is equipped with an intuitive display that provides real-time updates and error codes‚ such as the SUL code‚ which indicates a sulfated battery. This feature ensures users can identify and address issues promptly. The device is compatible with various battery types and sizes‚ making it versatile for different applications. Its robust design and safety features‚ including overcharge protection and thermal monitoring‚ ensure safe and effective charging. Regular use of the Schumacher Battery Charger helps extend battery life and performance. By following the manual’s guidelines‚ users can optimize their charging experience and resolve common issues like sulfation effectively.

1.2 Importance of Reading the Manual

Reading the Schumacher Battery Charger manual is crucial for safe and effective operation. It provides detailed instructions on how to use the charger‚ understand error codes like SUL‚ and perform troubleshooting. The manual explains the desulfation mode‚ which is essential for restoring sulfated batteries. By following the guidelines‚ users can avoid potential hazards‚ such as overcharging or improper connections‚ ensuring both personal and equipment safety. The manual also offers tips for maintaining the charger and battery‚ which helps extend their lifespan. Familiarizing yourself with the content enables you to diagnose issues quickly and apply the correct solutions. Neglecting to read the manual may lead to misunderstandings of error codes‚ improper charging techniques‚ or even damage to the battery or charger. Therefore‚ it is essential to thoroughly review the manual before using the Schumacher Battery Charger to maximize its performance and functionality.

Understanding the SUL Error Code

The SUL error code indicates a sulfated battery detected by the Schumacher charger. This triggers desulfation mode to restore the battery. Understanding this code is key to maintaining battery health.

2.1 What Does the SUL Code Mean?

The SUL code on a Schumacher battery charger signifies the detection of a sulfated battery. Sulfation occurs when lead sulfate crystals form on the battery’s plates‚ reducing its performance and capacity. This error prompts the charger to initiate desulfation mode‚ a process designed to break down these crystals and restore the battery’s health. The charger will typically display the SUL code and enter this mode automatically when it detects sulfation. Understanding this code is crucial for maintaining battery longevity and ensuring optimal charging efficiency. If the desulfation process is unsuccessful‚ the battery may need replacement. Always refer to the manual for specific instructions on handling the SUL code and desulfation procedures.

2.2 Causes of the SUL Error

The SUL error on a Schumacher battery charger is primarily caused by battery sulfation‚ a common issue in lead-acid batteries. Sulfation occurs when lead sulfate crystals form on the battery’s plates‚ typically due to prolonged disuse‚ incomplete charging‚ or high temperatures. Over time‚ these crystals harden‚ reducing the battery’s capacity and performance. Other factors contributing to sulfation include old battery age‚ deep discharges‚ and improper storage conditions. When the charger detects these crystals‚ it triggers the SUL error and enters desulfation mode to attempt recovery. If left unaddressed‚ sulfation can permanently damage the battery‚ making it unable to hold a charge. Regular maintenance and proper charging habits can help prevent sulfation and reduce the likelihood of encountering the SUL error.

2.3 Desulfation Mode Explained

Desulfation mode is a specialized process activated by the Schumacher battery charger when it detects a sulfated battery‚ indicated by the SUL error. This mode uses high-frequency pulses to break down lead sulfate crystals that have formed on the battery plates. The process is automatic and requires no user intervention. Desulfation typically lasts between 8 to 10 hours‚ depending on the severity of sulfation. During this time‚ the charger works to restore the battery’s capacity and performance. If successful‚ the battery may regain its ability to hold a charge. However‚ if the sulfation is severe‚ the process may fail‚ and the battery will be deemed unusable. Desulfation mode is a critical feature that extends battery life and ensures optimal performance when properly utilized. Regular use of this feature can help maintain your battery’s health and prevent future sulfation issues.

Troubleshooting the SUL Error

Troubleshooting the SUL error involves checking the battery voltage and connections. Ensure the battery is properly connected and charged. Allow the desulfation process to complete‚ as it may resolve the issue. If unresolved‚ the battery may need replacement.

3.1 How to Identify a Sulfated Battery

Identifying a sulfated battery can be done through several key observations. First‚ check the battery’s voltage using a multimeter; a sulfated battery typically reads lower than expected. Next‚ look for physical signs such as swelling‚ bloating‚ or corrosion on the terminals. Performance-wise‚ a sulfated battery may struggle to hold a charge‚ cause slow engine starts‚ or fail to power electrical systems effectively. Additionally‚ the Schumacher charger displaying the SUL error code is a direct indicator of sulfation. If these symptoms persist‚ it’s crucial to address the issue promptly to prevent further damage. Regular maintenance and proper storage can help prevent sulfation‚ ensuring your battery remains in optimal condition.

3.2 Steps to Resolve the SUL Error

To resolve the SUL error‚ start by allowing the charger to enter desulfation mode automatically‚ as this is its default response to detecting sulfation. This process can take 8 to 10 hours‚ during which the charger attempts to break down sulfate crystals on the battery plates. After desulfation‚ check the battery voltage using a multimeter to ensure it has returned to a normal range. If the error persists‚ inspect the battery for physical damage or corrosion and clean the terminals if necessary. If the battery voltage remains low or the charger indicates a “bad battery‚” replacement may be required. Always follow safety precautions‚ such as wearing gloves and working in a well-ventilated area. Patience is key‚ as desulfation can be time-consuming and not all batteries can be fully restored.

3.3 Desulfation Process and Duration

The desulfation process on a Schumacher battery charger is designed to address sulfated batteries by breaking down lead sulfate crystals that hinder performance. When the SUL error is detected‚ the charger automatically enters desulfation mode‚ which typically lasts between 8 to 10 hours. During this time‚ the charger applies a specialized current to restore the battery’s capacity. It’s important to allow the process to complete uninterrupted‚ as stopping it early may reduce effectiveness. After desulfation‚ the charger will attempt to charge the battery normally. If successful‚ the SUL error will clear‚ and the battery should function better. However‚ if desulfation fails‚ the charger may indicate a “bad battery‚” signaling that replacement is necessary. Always monitor the charger’s progress and ensure the battery is compatible with the desulfation feature. This process is a crucial step in reviving sulfated batteries and extending their lifespan.

Maintenance and Care Tips

Regularly inspect the battery terminals and cables for corrosion. Store batteries in a cool‚ dry place away from direct sunlight. Avoid overcharging‚ as it can reduce battery life. Always follow the charger’s guidelines for maintenance and care to ensure optimal performance and longevity of both the charger and the battery.

4.1 Proper Storage of the Battery

Proper storage is crucial for maintaining battery health. Store the battery in a cool‚ dry place‚ away from direct sunlight and moisture. Ensure the area is well-ventilated. Avoid extreme temperatures‚ as they can cause irreversible damage. If storing for an extended period‚ charge the battery to about 50% capacity to prevent sulfation. Use a battery maintainer or trickle charger to keep the charge level stable. Always place the battery on a stable‚ non-conductive surface. Clean the terminals before storage to prevent corrosion. Follow these guidelines to preserve battery performance and extend its lifespan. Proper storage also helps prevent the SUL error code from appearing during charging. By adhering to these tips‚ you can ensure your battery remains functional and ready for use when needed.

4.2 Regular Maintenance Checks

Regular maintenance checks are vital to ensure your battery performs optimally and prevent issues like the SUL error code. Start by inspecting the battery terminals for corrosion or dirt. Clean them with a wire brush and baking soda solution if necessary. Check the battery’s charge level using a multimeter or the charger’s built-in display. Ensure the battery is stored in a cool‚ dry environment to prevent sulfation. Inspect the battery casing for cracks or damage‚ as this can expose internal components to moisture. Use the Schumacher battery charger to maintain the correct charge levels and avoid overcharging. Regularly test the battery’s voltage and cold-cranking amps to identify potential weaknesses. By performing these checks‚ you can extend the battery’s lifespan and reduce the likelihood of encountering the SUL error during charging. Consistent maintenance ensures reliability and optimal performance for your vehicle or equipment.

4.3 How to Prevent Sulfation

Preventing sulfation is key to maintaining your battery’s health and avoiding the SUL error code. Start by ensuring the battery is fully charged before storage‚ as partial charges can lead to sulfation. Use the Schumacher battery charger’s maintenance mode to keep the battery at optimal levels during storage. Avoid deep discharges‚ as frequent draining can accelerate sulfation. Store the battery in a cool‚ dry place away from direct sunlight and moisture. If the battery must be stored for extended periods‚ disconnect it from any devices and charge it every 3 to 6 months. Regular charging cycles help prevent lead sulfate buildup. Additionally‚ using a high-quality charger with desulfation capabilities‚ like the Schumacher charger‚ can help reverse early stages of sulfation. By following these steps‚ you can significantly reduce the risk of sulfation and extend the lifespan of your battery.

Continue Reading

wgen9500df manual

Welcome to the Westinghouse WGen9500DF manual! This guide provides essential information for safe and effective operation of your dual-fuel portable generator․ Read carefully to ensure optimal performance and safety․

1․1 Overview of the WGen9500DF Generator

The Westinghouse WGen9500DF is a dual-fuel portable generator offering 9500 running watts (12500 peak) on gasoline and 8500 running watts (11200 peak) on propane․ Featuring a steel fuel tank, it includes a manual and quick start guide for easy setup․ Compatible with the ST Switch, it ensures efficient performance in various settings․

1․2 Importance of Reading the Manual

Reading the manual is crucial for understanding safety precautions, proper operation, and maintenance of the WGen9500DF generator․ It ensures safe usage, helps troubleshoot issues, and provides guidelines for maximizing performance․ Failure to follow instructions can lead to accidents or equipment damage․ Always review the manual thoroughly before operating the generator․

Key Features of the WGen9500DF Generator

The WGen9500DF offers dual fuel operation, high power output, and a robust, portable design, making it a versatile and reliable choice for portable energy solutions․

2․1 Dual Fuel Capability (Gasoline and Propane)

The WGen9500DF features dual fuel operation, allowing users to choose between gasoline and propane․ This flexibility ensures continuous power with options to suit fuel availability and efficiency preferences, enhancing versatility for various applications and environments․

2․2 Power Output Specifications

The WGen9500DF delivers 9,500 running watts and 12,500 peak watts on gasoline, and 8,500 running watts and 11,200 peak watts on propane․ This robust power output ensures reliable performance for heavy-duty appliances and tools, making it ideal for home backup, construction sites, and outdoor events․

2․3 Portability and Design

The WGen9500DF features a robust steel frame and durable design, ensuring long-lasting performance․ Its compact open-frame structure and built-in wheels enhance portability, making it easy to transport to job sites or camping locations․ The generator also includes a convenient handle for added mobility and is designed to withstand challenging environments․ ST Switch compatibility further adds to its versatility․

Technical Specifications of the WGen9500DF

The WGen9500DF operates on dual fuel, delivering 9500 running watts and 12500 peak watts with gasoline, and 8500 running watts and 11200 peak watts with propane․ It features a 6․6-gallon steel fuel tank, ensuring extended runtime, and is compatible with the ST Switch for seamless transfer․

3․1 Running and Peak Watts for Gasoline and Propane

The WGen9500DF provides 9500 running watts and 12500 peak watts when using gasoline, ensuring reliable power for heavy-duty appliances․ On propane, it delivers 8500 running watts and 11200 peak watts, offering flexibility without compromising performance․ This dual-fuel capability makes it versatile for various power needs, whether at home or on the job site․

3․2 Fuel Tank Capacity and Material

The WGen9500DF features a 6․6-gallon fuel tank made of durable steel, ensuring long-lasting performance and reliability․ This robust construction allows for extended runtime, making it ideal for both home backup and outdoor use․ The steel material enhances safety and durability, while the generous capacity minimizes frequent refueling needs․

3․4 Compatibility with the ST Switch

The WGen9500DF is compatible with the ST Switch, enabling seamless automatic power transfer․ This feature is ideal for home backup systems, ensuring continuous power during outages․ The ST Switch must be purchased separately and installed properly to leverage this functionality for enhanced convenience and reliability․

Safety Precautions and Warnings

Always follow safety guidelines to avoid hazards․ Ensure proper ventilation to prevent carbon monoxide buildup and keep the generator away from flammable materials․ Read the manual thoroughly for detailed precautions and warnings to ensure safe operation and protect yourself and others from potential risks․

4․1 General Safety Guidelines

Always follow safety guidelines to avoid hazards․ Ensure proper ventilation to prevent carbon monoxide buildup․ Keep the generator away from flammable materials and operate it on a level, stable surface․ Avoid overloading the generator, and never touch electrical components with wet hands․ Refer to the manual for detailed safety precautions to ensure safe operation․

4․2 Proper Operating Conditions

Operate the WGen9500DF in well-ventilated areas, away from flammable materials․ Ensure the generator is on a level, stable surface․ Avoid use in extreme weather conditions like rain or snow․ Keep the unit at least 3 feet away from windows and doors to prevent carbon monoxide buildup․ Operate within the recommended temperature range of 32°F to 104°F (0°C to 40°C)․

4․3 Handling and Storage Safety

Store the generator in a dry, cool place, away from open flames or sparks․ Ensure the fuel tank is drained before long-term storage․ Keep the unit away from children and pets․ Properly dispose of packaging materials responsibly․ Always handle the generator with care to avoid damage․ Use protective gear during handling to prevent injuries․

Assembly and Installation

Begin by unpacking and verifying all parts are included․ Follow the step-by-step assembly instructions carefully․ Complete initial setup, including fuel system preparation․ Test the generator to ensure proper function before regular use․ Always refer to the manual for specific guidance to avoid errors and ensure safety․

5․1 Unpacking and Inventory of Parts

Start by carefully unpacking the generator and all included accessories․ Ensure the box contains the generator, frame, wheels, handles, and hardware․ Check for any damage or missing items․ Compare the contents with the parts list provided in the manual․ Report any discrepancies to customer service immediately to avoid assembly issues․

5․2 Step-by-Step Assembly Instructions

Begin by attaching the wheels to the generator’s base using the provided bolts․ Next, secure the handles to the frame tightly․ Ensure all parts align properly and tighten all bolts with a torque wrench as specified․ Double-check all connections for stability and safety before proceeding to the initial setup․

5․3 Initial Setup and Testing

After assembly, ensure all parts are securely attached․ Check fuel levels and ensure the generator is on a level surface․ Connect the battery and turn the key to test the ignition․ Start with gasoline, allow the engine to run for 5-10 minutes without load, then gradually add power to test performance and ensure proper function․

Operating Instructions

Start by preparing the generator, ensuring all safety checks are done․ Begin with gasoline, then switch to propane if needed․ Monitor load levels and adjust accordingly for optimal performance and safety․

6․1 Starting the Generator on Gasoline

Ensure the area is well-ventilated and clear of flammable materials․ Check the fuel level and ensure the generator is on a level surface․ Turn the fuel valve to the “on” position, set the choke to “start,” and pull the recoil handle steadily to start the engine․ Once running, adjust the choke to “run” for smooth operation․

6․2 Switching to Propane Operation

Before switching to propane, ensure the engine is off and cool․ Connect the propane tank securely, check for leaks using soap water, and turn the propane valve on․ Select propane mode, restart the generator, and allow it to run for a few minutes to ensure proper operation․ Always operate in a well-ventilated area․

6․3 Load Management and Monitoring

Monitor the generator’s load to avoid overloading․ Always check the power ratings of connected appliances․ Use the built-in wattage meter to track current draw․ Prioritize essential devices when load is high․ Refer to the manual for specific power limits and guidelines to ensure safe and efficient operation․ Never exceed the generator’s rated capacity․

Maintenance and Troubleshooting

Regular maintenance ensures optimal performance․ Change oil every 50 hours, clean air filters, and inspect spark plugs․ Refer to the troubleshooting guide for common issues and solutions to keep your generator running smoothly and efficiently․

7․1 Regular Maintenance Schedule

Follow the maintenance schedule to ensure your WGen9500DF runs efficiently․ Change the oil every 50 hours of operation, clean or replace the air filter every 100 hours, and inspect the spark plug annually․ Check the fuel tank for leaks and ensure all connections are secure․ Regular maintenance prevents breakdowns and extends the generator’s lifespan․

7․2 Common Issues and Solutions

Address common issues promptly to maintain performance․ Low power output may indicate overloaded circuits; unplug non-essential devices․ If the generator won’t start, check fuel levels and ensure the choke is properly set․ For faulty spark plugs, replace them as needed․ Refer to troubleshooting guides in the manual for detailed solutions and ensure safety during repairs․

7․3 Resetting the Circuit Breaker

Resetting the circuit breaker is essential if it trips due to overload․ Locate the breaker on the control panel, switch it to the “OFF” position, then firmly move it to “ON․” Ensure all connected devices are turned off before resetting․ Regularly inspect and clean the breaker to prevent malfunctions and ensure reliable operation․

Warranty and Customer Support

Your WGen9500DF is backed by a 5-year limited warranty․ For inquiries, contact customer service at 855-944-3571 or visit the official Westinghouse website․ Register your product online for warranty validation and support․

8․1 Warranty Coverage Details

The WGen9500DF is covered by a 5-year limited warranty for parts and labor․ This warranty protects against defects in materials and workmanship․ To validate your warranty, ensure product registration is completed online․ Note that improper use or failure to follow manual instructions may void the warranty․ Refer to the manual for full terms and conditions․

8․2 Contacting Customer Service

For inquiries or assistance, contact Westinghouse customer service at 855-944-3571․ You can also reach them via email or through the official website․ Have your product serial number ready for faster support․ Refer to the manual for additional contact details and resources to ensure prompt resolution of any issues or concerns you may have․

8․3 Registering Your Product

Register your WGen9500DF by visiting the official Westinghouse website․ Fill out the product registration form with your generator’s serial number and personal details․ Registration ensures warranty validation and provides access to exclusive support․ For assistance, call customer service at 855-944-3571․ Keep your registration confirmation for future reference and warranty claims․

Accessories and Optional Equipment

The WGen9500DF includes a comprehensive manual, warranty, and quick start guide․ Optional equipment like the ST Switch can enhance functionality, purchased separately for added convenience․

9․1 Included Accessories (Manual, Quick Start Guide)

Your WGen9500DF comes with a detailed user manual and a quick start guide․ The manual provides comprehensive instructions, while the quick start guide offers a concise setup overview․ Both are essential for understanding your generator’s operation, ensuring safety, and maximizing performance․ Refer to them before initial use for a seamless experience․

9․2 Recommended Additional Equipment

Consider investing in a heavy-duty extension cord, surge protector, and propane hose for enhanced functionality․ A generator cover and wheel kit can also improve portability and protection․ These accessories ensure optimal performance, safety, and longevity of your WGen9500DF, making it a reliable power solution for various applications and environments․

Environmental and Disposal Considerations

Always follow eco-friendly practices when using your WGen9500DF․ Properly dispose of packaging and hazardous materials․ Recycle where possible and adhere to local environmental regulations for safe disposal․

10․1 Eco-Friendly Usage Tips

Optimize fuel efficiency by using the correct fuel type for your needs․ Regularly maintain the generator to ensure proper performance and reduce emissions․ Avoid overloading, as this can increase fuel consumption and wear․ Always follow local environmental regulations and consider using propane for lower emissions․ Properly store and dispose of fuels and waste materials responsibly․

10․2 Proper Disposal of Packaging and Waste

Dispose of packaging materials responsibly by recycling paper, cardboard, and plastic․ Properly discard hazardous waste, such as batteries and fuels, at designated facilities․ Ensure all waste materials are handled in an environmentally responsible manner to minimize ecological impact and comply with local regulations․

Updates and Revisions to the Manual

Regularly check the official Westinghouse website for manual updates and revisions to ensure you have the latest information for safe and optimal generator operation and refer to the version history for details․

11․1 Checking for the Latest Manual Version

To ensure you’re using the most up-to-date guide, visit the official Westinghouse website or contact customer support․ Regular updates may include safety enhancements, new features, or technical improvements; Always verify the manual version matches your generator model for accurate information and compliance with safety standards․

11․2 Understanding Revision History

The revision history in the WGen9500DF manual tracks updates, improvements, and clarifications made to the document․ Each revision may include new features, safety updates, or technical clarifications, ensuring the manual remains accurate and relevant for users․

Always refer to the latest version for the most current information․ Updates are noted in the revision log, helping users stay informed about changes that may affect their generator’s operation or maintenance․

User Feedback and Reviews

Users praise the WGen9500DF for its reliability and dual-fuel efficiency․ Many highlight its robust performance during power outages․ Some note the importance of following manual guidelines for optimal use․

Overall, positive reviews emphasize its durability and ease of operation, making it a popular choice for home and outdoor power needs․

12․1 Common User Experiences

Users frequently highlight the WGen9500DF’s reliability and dual-fuel efficiency․ Many report excellent performance during power outages, emphasizing its ability to handle heavy loads․ Common praises include ease of setup and robust construction․ However, some users stress the importance of adhering to the manual’s guidelines for optimal operation and longevity of the generator․

12․2 Tips from Experienced Users

Experienced users recommend regular maintenance, such as oil changes and filter checks, to ensure longevity․ Always use the correct fuel type and monitor load levels to prevent overload․ Keep the generator on a level surface and ensure proper ventilation․ Refer to the manual for specific guidelines and safety precautions to maximize performance and safety․

13․1 Summary of Key Takeaways

The WGen9500DF manual emphasizes safety, dual-fuel efficiency, and proper maintenance․ Key points include adhering to safety precautions, understanding fuel options, and following maintenance schedules․ Reading the manual thoroughly ensures optimal performance and longevity․ Failure to comply may result in hazards or equipment damage․ Always prioritize responsible usage and refer to the guide for troubleshooting and updates․

13․2 Encouragement for Safe and Effective Usage

Always prioritize safety and efficiency when operating the WGen9500DF․ Follow the manual’s guidelines, perform regular maintenance, and use genuine parts․ By adhering to these practices, you ensure reliable performance and longevity․ Remember to stay informed through updates and troubleshooting tips․ Enjoy the benefits of your generator while maintaining a safe environment for everyone․

Continue Reading

power air fryer manual

Welcome to the Power Air Fryer Manual! This guide helps you master your air fryer, exploring its features, operation, and safety tips for delicious, healthier meals․

Overview of the Power Air Fryer

The Power Air Fryer is a versatile kitchen appliance designed to cook a wide range of dishes with minimal oil․ It features a digital touch screen, preset functions, and adjustable temperature controls for precise cooking․ The air fryer uses hot air circulation technology to achieve crispy results, making it ideal for frying, baking, and grilling․ Its compact design and multi-functional capabilities make it a convenient addition to any home kitchen․

Importance of Reading the Manual

Reading the Power Air Fryer Manual is essential for safe and effective use․ It provides detailed instructions, safety guidelines, and troubleshooting tips․ Understanding its features, such as preset functions and temperature controls, ensures optimal performance․ The manual also covers proper maintenance and care, helping you extend the appliance’s lifespan․ Retain it for future reference and share it with others who will use the air fryer․

Safety Precautions

Ensure the air fryer is placed on a stable, heat-resistant surface, away from flammable materials․ Never leave it unattended while in operation and avoid overloading the basket․

Before First Use

Before using your Power Air Fryer for the first time, carefully unpack and inspect all components for damage․ Wash the fry basket and pan with mild soap and dry thoroughly․ Ensure the appliance is placed on a stable, heat-resistant surface․ Plug in the unit and allow it to preheat for 5 minutes․ Read the manual thoroughly to understand all features and safety guidelines before cooking․

During Operation

While operating the Power Air Fryer, ensure the basket is not overcrowded for even cooking․ Press the Power Button to start, then select a preset or manually set temperature and time․ Keep children away and avoid placing flammable materials nearby․ Do not leave the appliance unattended․ Ensure the unit is clean and free from food residue to maintain performance and safety during cooking cycles․

Product Specifications

The Power Air Fryer features a 6L food tray capacity, 220V-50HZ rated voltage, and 1650W power․ It includes a digital interface with preset functions for versatile cooking․

Technical Details

The Power Air Fryer operates on a 220V power supply with a nominal power of 1650W, ensuring efficient cooking․ It features a 6L food tray capacity, ideal for family meals․ The digital interface includes preset functions for temperature and time settings, allowing precise control․ Advanced heating elements and Turbo Cyclonic Air technology ensure even cooking and crispy results without oil․ Energy-efficient design minimizes power consumption․

Design Features

The Power Air Fryer boasts a sleek, compact design with a digital touchscreen interface for easy navigation․ Its spacious 6L food basket accommodates various meal sizes․ Featuring a non-stick pan and dishwasher-safe parts, cleaning is effortless․ The unit includes multiple preset buttons for common dishes, enhancing user convenience․ A cool-touch exterior ensures safety, while the modern aesthetic complements any kitchen countertop, making it both functional and visually appealing․

Assembly and Initial Setup

Unpack and identify all parts, ensuring they are undamaged․ Place the air fryer on a flat, heat-resistant surface․ Plug in the power cord securely before first use․

Unpacking and Parts Identification

Carefully unpack the air fryer and accessories, ensuring all components are included and undamaged․ Familiarize yourself with the main parts: the fry basket, pan, and control panel․ Check for any visible damage or defects․ Inspect the power cord and ensure it is intact․ Verify that all accessories, such as the user manual, are present; Proceed only if everything is in good condition․

Placing the Air Fryer

Place the air fryer on a stable, flat surface, ensuring it is heat-resistant and away from flammable materials․ Maintain proper ventilation by keeping it at least 4 inches away from walls or other objects․ Avoid placing it near water sources or in humid environments to prevent electrical hazards․ Ensure the surface is clean and dry before positioning the appliance for safe operation․

Basic Operation Guide

Press the Power Button to start․ Use the M Button for preset functions or manually set temperature and time․ The air fryer will begin cooking your food evenly․

Power Button and Preset Functions

Press the Power Button to activate the air fryer․ Use the M Button to select preset functions for specific foods like fries or chicken․ Each preset automatically sets optimal time and temperature, ensuring perfect results․ Simply load the basket, choose your preset, and let the air fryer do the work for a hassle-free cooking experience with minimal effort․

Manual Temperature and Time Settings

For precise control, manually adjust the temperature and timer using the designated buttons (figs․ 2,3,4,5)․ Set your desired temperature and cooking time to suit your recipe․ Ensure the Fry Basket is not overloaded for even cooking․ This feature allows customization for various foods, from crispy fries to tender meats, ensuring optimal results every time with minimal effort required․

Advanced Cooking Functions

The Power Air Fryer offers multi-functionality beyond frying, including broiling, baking, and roasting․ Use one-touch presets for perfect results with minimal effort, ideal for meals like burgers, calzones, and doughnuts․

Multi-Functionality Beyond Frying

Beyond frying, the Power Air Fryer excels at broiling, baking, and roasting․ Its advanced design allows for versatile cooking, ensuring perfectly cooked meals with minimal effort․ The appliance’s ability to handle a variety of dishes, from crispy fries to tender calzones, makes it a versatile addition to any kitchen, enhancing your culinary creativity effortlessly․

Using One-Touch Presets

The Power Air Fryer features convenient one-touch presets for frying, roasting, grilling, and baking․ Simply select your desired function using the M Button, and the appliance will automatically adjust time and temperature․ These presets ensure perfect results for dishes like shrimp, fries, and chicken, making cooking effortless and efficient․ Explore the variety of options to enhance your culinary experience with ease and precision․

Cleaning and Maintenance

Regularly wipe the exterior and interior with a damp cloth․ Avoid abrasive cleaners and submerge the basket in water․ Clean after each use for optimal performance and hygiene․

Regular Cleaning Procedures

Regular cleaning is essential for maintaining your Power Air Fryer’s performance․ After each use, wipe the exterior and interior with a damp cloth․ Remove food residue from the basket and pan, and wash them with mild soap․ Avoid using abrasive cleaners or submerging electrical parts in water․ For tough spots, use a soft brush; Dry all parts thoroughly to prevent rust and ensure optimal functionality․

Deep Cleaning Tips

For a deep clean, mix equal parts water and vinegar in the basket․ Set the air fryer to 375°F for 10 minutes to loosen residue․ Scrub tough areas with a non-abrasive brush․ Soak the basket and pan in warm soapy water for 30 minutes․ Rinse thoroughly and dry to prevent water spots․ Regular deep cleaning ensures your air fryer remains in top condition and maintains its performance․

Troubleshooting Common Issues

Troubleshooting helps resolve issues like uneven cooking or malfunction․ Check power connections, ensure proper basket placement, and clean regularly․ Resetting the air fryer often fixes minor glitches․

Identifying Common Problems

Troubleshooting your Power Air Fryer begins with identifying issues like uneven cooking, malfunctioning buttons, or overheating․ Check for improper basket placement, food overcrowding, or blocked air vents․ Ensure the power cord is securely connected and the outlet is functioning․ If the air fryer stops working, reset it by unplugging and replugging․ Regular cleaning prevents grease buildup, which can cause performance problems․ Addressing these common issues ensures optimal functionality and safety․

Resetting the Air Fryer

To reset your Power Air Fryer, unplug it from the power source and wait for 30 seconds․ This allows the appliance to cool down and clear any temporary errors․ Plug it back in and press the Power button to restart․ Ensure proper ventilation and check for any blockages in air vents․ If issues persist, refer to the troubleshooting section or contact customer support for assistance․

Accessories and Replacement Parts

Explore a range of accessories like baskets, pans, and racks to enhance your cooking experience․ Replacement parts, such as doors or trays, can be sourced from official websites or authorized sellers․

Available Accessories

Enhance your cooking experience with a variety of accessories designed for the Power Air Fryer․ These include additional fry baskets, non-stick pans, racks, and other kitchen utensils․ Accessories are crafted to optimize performance and versatility, allowing you to explore more recipes and cooking techniques․ They are available for purchase on official websites, retail stores, or through authorized sellers, ensuring compatibility and quality․

Sourcing Replacement Parts

Replacement parts for the Power Air Fryer are widely available through official websites, authorized sellers, and online marketplaces․ Users can find components like fry baskets, doors, and accessories․ Ensure compatibility by verifying model numbers and specifications․ Purchasing from trusted sources guarantees authenticity and safety․ Replacement parts are essential for maintaining optimal performance and extending the lifespan of your Power Air Fryer․

Cooking Tips and Recipes

Discover essential cooking tips and popular recipes for your Power Air Fryer․ Achieve crispy, delicious results with minimal oil․ Try air-fried fries, chicken, and doughnuts for a healthier twist on favorites․

Essential Cooking Tips

For optimal results, avoid overcrowding the basket, ensuring even air circulation․ Pat food dry before cooking to enhance crispiness․ Lightly spray with oil for golden finishes․ Shake the basket halfway through cooking for uniform results․ Experiment with marinades and seasonings to elevate flavors․ Preheat the air fryer for 2-3 minutes for consistent cooking․ These tips ensure crispy, delicious dishes every time, making your air fryer experience even more satisfying․

Popular Air Fryer Recipes

Discover delicious and easy-to-make dishes like crispy shrimp, southern-style chicken, and air-fried doughnuts․ The Power Air Fryer excels at cooking favorites such as golden fries, calzones, and even burgers․ Experiment with Emeril Lagasse’s signature recipes for a gourmet touch․ From snacks to main meals, these recipes showcase the versatility of your air fryer, delivering flavorful results with minimal oil․ Perfect for quick, tasty, and healthier cooking options․

Energy Efficiency and Cost Savings

The Power Air Fryer uses advanced hot air circulation, reducing energy consumption compared to traditional ovens․ Its faster cooking times lower overall power usage, saving you money while preparing healthier meals efficiently․

How the Air Fryer Saves Energy

The Power Air Fryer saves energy by using rapid air circulation technology, which cooks food faster than traditional ovens․ It requires less power to operate and doesn’t need preheating, reducing overall energy consumption․ This efficient design leads to lower electricity bills while delivering crispy, healthier results with minimal oil, making it an eco-friendly and cost-effective cooking solution for everyday meals․

Reducing Energy Bills

The Power Air Fryer helps reduce energy bills by using less power than conventional ovens; Its rapid air circulation technology cooks food faster, minimizing cooking time and energy consumption․ Without the need for preheating, it operates more efficiently, lowering overall electricity usage․ This makes it a cost-effective and eco-friendly alternative for daily cooking, ensuring crispy results with less energy waste․

The Power Air Fryer Manual guides you to maximize your appliance’s potential, ensuring delicious meals while promoting healthy cooking․ Explore its versatile functions, from frying to baking, and enjoy the convenience it brings to your kitchen․ Refer to the warranty for support and continue experimenting with new recipes for endless culinary possibilities․

Final Tips for Optimal Use

  • Always preheat the air fryer for even cooking results․
  • Pat dry food before cooking to enhance crispiness․
  • Avoid overcrowding the basket for proper air circulation․
  • Clean the appliance regularly to prevent food residue buildup․
  • Use parchment paper for messy recipes to ease cleanup․
  • Experiment with presets and manual settings for customized meals․

By following these tips, you’ll unlock your air fryer’s full potential and enjoy perfectly cooked dishes every time while maintaining its longevity․

Warranty and Support Information

Your Power Air Fryer is backed by a limited warranty covering manufacturing defects for a specified period․ For inquiries or issues, contact customer support via phone or the official website․ Retain your purchase receipt and manual for warranty claims․ Visit the manufacturer’s site for detailed warranty terms, FAQs, and downloadable resources to ensure optimal performance and troubleshooting assistance․

Continue Reading

hustler parts manual

Welcome to the Hustler Parts Manual, your comprehensive guide to maintaining and repairing Hustler outdoor equipment․ This manual provides detailed diagrams, parts lists, and troubleshooting tips to ensure optimal performance and longevity of your mower․ Whether you’re a seasoned professional or a homeowner, this resource helps you navigate maintenance, repairs, and upgrades with confidence․ Explore the essential tools and procedures to keep your Hustler equipment running smoothly․

1․1 Importance of the Parts Manual for Hustler Equipment

The Hustler Parts Manual is essential for maintaining, repairing, and upgrading your outdoor equipment․ It provides detailed diagrams, parts lists, and troubleshooting guides, ensuring you can identify and source the correct components․ This resource helps you perform routine maintenance, diagnose issues, and understand safety precautions․ By referencing the manual, you can extend the lifespan of your Hustler equipment, ensure optimal performance, and maintain warranty compliance․ It’s a vital tool for both professionals and homeowners seeking to keep their mowers in peak condition․

1․2 Overview of Hustler Lawn Mowers and Outdoor Equipment

Hustler Turf Equipment is renowned for its innovative, high-performance outdoor machinery․ Their product line includes zero-turn mowers, lawn tractors, and commercial-grade equipment designed for efficiency and durability․ Built with quality materials and cutting-edge technology, Hustler mowers are trusted by professionals and homeowners alike․ The company’s commitment to excellence ensures that each model delivers superior cutting performance, maneuverability, and reliability․ Whether for residential or commercial use, Hustler equipment is tailored to meet diverse landscaping needs with precision and power․

Understanding the Hustler Parts Identification System

The Hustler Parts Identification System helps users decode model and serial numbers to locate specific parts․ Detailed diagrams and catalogs guide precise identification, ensuring accurate orders and repairs․

2․1 Decoding Model Numbers and Serial Numbers

Model numbers and serial numbers are crucial for identifying Hustler parts․ Model numbers like “FasTrak 36 & 42 Decks” indicate specific mower types and deck sizes․ Serial numbers, such as “926501” or “931741,” provide production details and help locate exact parts․ Use these codes in Hustler’s database or manuals to find accurate diagrams and catalogs․ This ensures correct part selection, preventing mismatches and repair delays․ Always reference the model and serial numbers for precise parts identification and ordering․

2․2 Navigating the Parts Diagrams and Catalogs

Hustler parts diagrams and catalogs provide detailed visual representations of equipment components․ These resources help users identify and locate specific parts efficiently․ Diagrams are organized by model and serial number, ensuring accuracy․ Catalogs list parts with descriptions and codes for easy reference․ Use the search function or filters to find specific components quickly․ Downloadable PDF versions allow offline access, while interactive features in digital catalogs enable zooming and part number searches․ This system streamlines parts identification and ordering for maintenance and repairs․

Maintenance and Repair Guidelines

Regular maintenance ensures optimal performance and extends equipment life․ Follow routine procedures, lubrication schedules, and troubleshooting tips outlined in the manual․ Refer to the Hustler parts manual for specific guidance․

3․1 Routine Maintenance Procedures

Routine maintenance is key to extending the life and reliability of your Hustler equipment․ Regularly inspect and replace air filters, check oil levels, and sharpen mower blades․ The Hustler Parts Manual provides detailed schedules for lubrication and part replacements․ Ensure all bolts and nuts are tightened to specified torque values․ Refer to the manual for guidance on proper maintenance techniques and timelines․ Neglecting these steps can lead to reduced performance or costly repairs․ Always use genuine Hustler parts for optimal results․

3;2 Lubrication and Service Schedules

Proper lubrication and adherence to service schedules are essential for maintaining your Hustler equipment․ Regularly grease pivot points and check hydraulic fluid levels․ The Hustler Parts Manual outlines specific lubrication intervals and recommended products․ Ensure engine oil is changed every 100 hours, and inspect spark arresters daily․ Replace worn or damaged parts promptly to prevent further issues․ Follow the manual’s guidelines for torque specifications and service timelines to keep your equipment running efficiently and reliably throughout the season․

Troubleshooting Common Issues

Identify and resolve common issues with your Hustler equipment using diagnostic guides and repair procedures․ Address engine problems, hydraulic malfunctions, and steering difficulties efficiently with the manual’s expert solutions․

4․1 Identifying and Resolving Engine Problems

Engine issues in Hustler equipment can often be traced to spark arresters, air filters, or fuel systems․ Check for worn or damaged components and ensure proper lubrication․ Regularly inspect the spark arrester and replace it every 500 hours or as needed․ Address overheating by verifying coolant levels and cleaning debris from radiators․ For persistent problems, consult the engine owner’s manual or contact an authorized service center for professional assistance․ Early detection prevents costly repairs and extends equipment lifespan․

4․2 Addressing Hydraulic and Steering Issues

Hydraulic and steering problems often stem from fluid leaks, contaminated oil, or worn seals․ Inspect hoses and connections for damage, and replace any faulty components․ Check fluid levels and ensure the hydraulic system is free from debris․ For steering issues, examine the gearbox and linkage for alignment; Refer to the Hustler parts manual for specific repair procedures and torque specifications․ Regular maintenance, such as cleaning and lubricating moving parts, helps prevent these issues and ensures smooth operation of your equipment․

Downloading and Accessing the Hustler Parts Manual

Download the Hustler parts manual for free from authorized sources․ Use model-specific searches to find the correct manual, ensuring accurate parts information and troubleshooting guides․

5․1 Step-by-Step Guide to Finding the Correct Manual

To find the correct Hustler parts manual, visit the official Hustler website or authorized dealers․ Enter your mower’s model number in the search bar․ Ensure the serial number matches for accuracy․ Download the PDF manual directly or access it through the provided links․ For additional support, use the “Find My Manual” button on partner sites like ManualsLib․ This ensures you receive the most relevant and up-to-date information for your specific equipment․

5․2 Free Download Options and Authorized Sources

Hustler parts manuals are available for free download from authorized sources like the official Hustler website, ManualsLib, and partner portals․ Visit the Hustler Equipment website and use the “Find My Manual” tool to locate your specific model․ Ensure the manual matches your mower’s serial and model numbers for accuracy․ Authorized dealers also provide direct links to download PDF versions․ Always verify the source to ensure you receive genuine, up-to-date documentation for safe and effective equipment maintenance․

Safety Precautions and Warnings

Adhere to safety guidelines when handling Hustler equipment․ Inspect spark arresters daily and replace every 500 hours․ Avoid exposure to harmful engine exhaust emissions․ Ensure compliance with fire prevention measures for safe operation․

6․1 Handling Hazardous Materials and Tools

When working with Hustler equipment, handle hazardous materials and tools with caution․ Wear protective gear and ensure proper ventilation when dealing with fuel or hydraulic fluids․ Spark arresters must be inspected daily and replaced every 500 hours to prevent fire hazards․ Avoid exposure to engine exhaust, as it contains harmful chemicals․ Use only hand tools for installations to prevent damage․ Always torque fasteners within specified ranges to ensure safety and performance․ Refer to the Engine Owner’s Manual for detailed guidelines on lubrication and service schedules․

6․2 Understanding Safety Symbols and Guidelines

Familiarize yourself with safety symbols and guidelines in the Hustler Parts Manual to ensure safe operation and maintenance․ Warning labels on fuel caps and hydraulic components indicate potential hazards․ Always wear protective gear, including gloves and eyewear, when handling tools or materials․ Spark arresters must be inspected daily to prevent fire risks․ Refer to the Engine Owner’s Manual for specific torque specifications and lubrication schedules․ Understanding these symbols and guidelines is crucial for preventing accidents and ensuring compliance with safety standards while working on your Hustler equipment․

Hustler Turf Equipment: Company Overview

Hustler Turf Equipment, based in Hesston, Kansas, specializes in innovative outdoor power equipment․ Known for zero-turn mowers, the company emphasizes quality, durability, and exceptional customer support․

7;1 History and Innovation in Outdoor Equipment

Hustler Turf Equipment, founded in the heart of Kansas, has a rich history dating back to its inception․ The company has consistently pushed boundaries with innovative designs, particularly in zero-turn mowers․ By integrating cutting-edge technology and listening to customer needs, Hustler has established itself as a leader in outdoor equipment․ Their commitment to innovation is evident in their product line, which balances power, agility, and durability, making them a trusted choice for both professionals and homeowners․

7․2 Commitment to Quality and Customer Support

Hustler Turf Equipment is renowned for its unwavering commitment to quality and customer satisfaction․ With a focus on American craftsmanship, the company ensures every product meets high standards of durability and performance․ Hustler prioritizes customer support, offering extensive resources such as detailed manuals, authorized service centers, and online forums․ Their dedication to excellence is reflected in their reliable equipment and responsive service, ensuring users receive the assistance they need to maintain and repair their outdoor equipment effectively․

Aftermarket Parts and Accessories

Explore the world of Hustler aftermarket parts and accessories, offering genuine components, third-party alternatives, and popular upgrades to enhance performance and customization of your equipment․

8․1 Genuine vs․ Aftermarket Parts: Pros and Cons

Genuine Hustler parts ensure compatibility and quality, backed by warranties and designed specifically for your equipment․ Aftermarket options offer cost savings and diverse choices but may lack official support․ Weighing factors like durability, fitment, and budget helps determine the best choice for maintaining your mower’s performance and longevity․ Always verify the reputation of aftermarket suppliers to ensure reliability and avoid potential compromises in quality or functionality․

8․2 Popular Accessories for Hustler Mowers

Enhance your Hustler mower’s performance with popular accessories like mulching kits, striping kits, and cargo trays․ Zero-turn mowers often benefit from LED light kits for visibility and protective covers for storage․ Baggers and discharge chutes improve debris management, while wheel weights and traction tires boost stability on uneven terrain․ These accessories, available through authorized dealers, help customize your mower to meet specific lawn care needs and ensure optimal performance in various conditions․

Service and Repair Resources

Access authorized Hustler dealers and service centers for professional repairs․ Online forums and communities provide valuable support․ Visit official Hustler websites for repair resources and guides․

9․1 Authorized Dealers and Service Centers

Hustler’s extensive network of authorized dealers and service centers ensures convenient access to genuine parts, repairs, and maintenance․ These certified professionals provide expert support, guaranteeing authentic components and reliable service․ Use Hustler’s online database to locate your nearest dealer, ensuring your equipment receives top-tier care․ Regular maintenance by authorized centers maintains warranty validity and optimizes performance, keeping your Hustler mower in peak condition․ Rely on these trusted experts for all your service and repair needs, ensuring longevity and efficiency for your outdoor equipment․

9․2 Online Communities and Forums for Support

Online communities and forums offer invaluable support for Hustler parts manual users․ Platforms like ManualsLib and Hustler’s official website provide access to downloadable manuals, while forums host discussions on troubleshooting, repairs, and maintenance․ These spaces allow users to share experiences, seek advice from experts, and find solutions to common issues․ Engaging with these communities can enhance your understanding of Hustler equipment, ensuring optimal performance and longevity through collective knowledge and shared resources․

Continue Reading

honeywell t3 thermostat manual pdf

The Honeywell T3 Thermostat Manual PDF is a comprehensive guide designed to help users understand‚ install‚ and operate the Honeywell T3 Thermostat effectively.

It covers essential features like energy-saving optimization‚ customizable schedules‚ and advanced settings‚ ensuring optimal performance and energy efficiency for home heating systems.

Overview of the Honeywell T3 Thermostat

The Honeywell T3 Thermostat is a programmable device designed to regulate home temperatures efficiently. It features energy-saving optimization and customizable heating schedules‚ making it ideal for residential use. With a user-friendly interface and sleek design‚ the T3 provides precise temperature control and enhances comfort. Its advanced algorithms adapt to heating patterns‚ ensuring optimal energy usage without compromising comfort. This thermostat is a smart choice for those seeking reliability and efficiency in home climate control.

Importance of the Manual for Proper Installation and Usage

The Honeywell T3 Thermostat Manual is crucial for correct installation and operation. It provides step-by-step instructions‚ ensuring users can set up and configure the device efficiently. The manual explains system requirements‚ compatibility‚ and troubleshooting tips‚ helping to avoid common issues. By following the guide‚ users can unlock all features‚ optimize energy savings‚ and maintain their home’s comfort effectively. Referencing the manual ensures safe and proper use‚ maximizing the thermostat’s performance and longevity.

Installation and Setup Instructions

The Honeywell T3 Thermostat Manual provides essential guidance for installation and setup‚ ensuring safe and efficient configuration of your device for optimal performance and functionality.

Step-by-Step Guide for Installing the Honeywell T3 Thermostat

Begin by turning off the power to your heating system at the circuit breaker. Remove the old thermostat and take note of the wiring connections. Mount the new T3 thermostat base‚ ensuring it is level and securely fastened. Connect the wires to the appropriate terminals as per the manual. Reattach the faceplate and restore power. Follow the on-screen prompts to complete the setup‚ including selecting your heating type and configuring wireless settings if applicable. Refer to the manual for detailed diagrams and troubleshooting tips.

System Requirements and Compatibility

The Honeywell T3 Thermostat is compatible with most standard heating systems‚ including gas‚ oil‚ and electric setups. It requires a 24V AC power supply and works with single-stage or multi-stage systems. Ensure your system meets the wiring requirements‚ typically 2-4 wires‚ depending on the configuration. The thermostat is designed for residential use and supports wireless communication with compatible receivers. Verify compatibility with your boiler or heating system before installation. Refer to the manual for specific wiring diagrams and system requirements to ensure proper functionality.

Key Features of the Honeywell T3 Thermostat

The Honeywell T3 Thermostat offers energy-saving optimization‚ customizable heating schedules‚ and smart operation. It features a clear display and intuitive interface‚ learning your heating patterns to enhance comfort and efficiency.

Energy-Saving Optimization Functions

The Honeywell T3 Thermostat features energy-saving optimization functions that learn your heating patterns and adjust settings to save energy while maintaining comfort. These algorithms ensure efficient operation by optimizing heating cycles and reducing unnecessary usage. The thermostat displays optimization status during operation‚ allowing users to monitor energy-saving performance. By default‚ optimization is disabled but can be activated through the installation guide instructions.

With smart operation‚ the T3 adapts to your schedule and preferences‚ balancing energy efficiency with comfort. It supports both AUTO mode for automatic temperature control and MANUAL mode for direct adjustments‚ providing flexibility for different needs.

Customizable Heating Schedules and Smart Operation

The Honeywell T3 Thermostat offers customizable heating schedules‚ allowing users to program temperature settings for different times of the day. Its smart operation enables the thermostat to learn and adapt to your heating patterns‚ ensuring comfort while optimizing energy use. With features like AUTO mode and MANUAL mode‚ users can switch between automatic temperature control and direct adjustments. This flexibility makes it easy to tailor heating schedules to individual preferences‚ enhancing convenience and efficiency.

Using the Honeywell T3 Thermostat Manual

The Honeywell T3 Thermostat Manual provides clear instructions for navigating basic operations‚ advanced settings‚ and troubleshooting‚ ensuring users can efficiently manage their heating system with ease.

Navigating the Manual for Basic Operations

The Honeywell T3 Thermostat Manual is structured to guide users through basic operations seamlessly. It begins with an overview of the thermostat’s layout‚ explaining the function of each button and display feature. The manual then details how to set temperatures‚ adjust modes‚ and navigate the intuitive interface. Clear instructions are provided for switching between AUTO and MANUAL modes‚ ensuring users can easily manage their heating preferences. Additionally‚ the guide covers essential tasks like setting schedules and understanding optimization functions‚ making it a vital resource for everyday use.

Advanced Settings and Configuration Options

The Honeywell T3 Thermostat Manual PDF provides detailed guidance on advanced settings‚ allowing users to customize their heating experience. It explains how to configure optimization functions‚ such as energy-saving modes and wireless communication setup. The manual also covers how to access and adjust system parameters‚ including custom heating patterns and temperature thresholds. With clear instructions‚ users can fine-tune their thermostat to meet specific needs‚ ensuring optimal performance and energy efficiency while maintaining comfort. This section is essential for users seeking to maximize their thermostat’s capabilities.

Programming and Scheduling

  • Learn to create custom heating and cooling schedules tailored to your daily routines.
  • Understand how to set up and manage both manual and automatic operating modes.
  • Discover how to optimize energy usage while maintaining comfort with programmable settings.

Creating Custom Heating and Cooling Schedules

The Honeywell T3 Thermostat allows users to create custom heating and cooling schedules tailored to their daily routines. By setting specific temperature preferences for different times of the day‚ users can optimize energy usage while maintaining comfort. The thermostat’s intuitive interface makes it easy to adjust settings‚ and its optimization algorithms ensure energy efficiency without compromising on performance. This feature is particularly useful for balancing convenience and energy savings‚ making it a standout option for modern homeowners seeking smart temperature control solutions.

Understanding Auto and Manual Modes

The Honeywell T3 Thermostat offers two primary operating modes: Auto and Manual. In Auto mode‚ the thermostat automatically adjusts heating and cooling based on pre-set schedules and optimization algorithms to save energy while maintaining comfort; Manual mode allows users to set a fixed temperature manually‚ providing direct control over the system. This feature is ideal for temporary adjustments or when a consistent temperature is preferred.

Switching between modes is simple‚ with clear indicators on the display. Auto mode optimizes energy use‚ while Manual mode offers flexibility for specific needs‚ ensuring the thermostat adapts to any lifestyle seamlessly.

Troubleshooting Common Issues

The Honeywell T3 Thermostat Manual PDF helps users troubleshoot common issues like wireless communication problems and display malfunctions. It provides step-by-step solutions for optimal functionality.

Resolving Wireless Communication Problems

The Honeywell T3 Thermostat Manual PDF provides detailed steps to address wireless communication issues. If the thermostat loses connection with the receiver box‚ ensure the devices are within range and free from interference. Restarting the thermostat and receiver can often resolve connectivity problems. Check for firmware updates and ensure all wires are securely connected. If issues persist‚ refer to the manual’s troubleshooting section for advanced solutions or contact Honeywell support for assistance.

Addressing Display and Button Functionality

The Honeywell T3 Thermostat Manual PDF offers guidance on resolving display and button issues. If the display is unresponsive‚ restart the thermostat or check for loose connections. Clean the screen gently to avoid damage. For button malfunctions‚ ensure they are free from debris. The manual also explains how to adjust brightness and contrast settings for optimal visibility. Refer to the troubleshooting section for detailed steps to restore functionality and ensure smooth operation of your Honeywell T3 Thermostat.

Maintenance and Care

Regular maintenance ensures optimal performance. Clean the thermostat and replace air filters as needed. Resetting to factory settings can resolve issues without affecting custom schedules or settings.

Replacing Air Filters and Cleaning the Thermostat

Regularly replacing air filters is crucial for maintaining the Honeywell T3 Thermostat’s efficiency. Dirty filters can reduce airflow and increase energy consumption. Replace the filter every 1-3 months‚ depending on usage. To clean the thermostat‚ gently wipe the display and surface with a soft cloth. Avoid harsh chemicals or liquids‚ as they may damage the device. Ensure the thermostat is powered off before cleaning. Proper maintenance ensures accurate temperature control and prolongs the device’s lifespan. Always refer to the manual for specific care instructions.

Resetting the Thermostat to Factory Settings

Resetting the Honeywell T3 Thermostat to Factory Settings

To reset the Honeywell T3 Thermostat to factory settings‚ press and hold the ‘Menu’ button along with the down arrow for about 10 seconds. This will display the reset option. Select ‘Reset’ to revert all settings to default. Note that this will erase custom settings‚ requiring you to reconfigure preferences. Resetting can resolve issues like communication problems or incorrect temperature readings. Proceed with caution and ensure settings are documented for easy reconfiguration after the reset.

Frequently Asked Questions

Common questions about the Honeywell T3 Thermostat include installation steps‚ energy-saving features‚ and troubleshooting wireless connectivity. Users also inquire about custom schedules and optimal performance tips.

Common Queries About the Honeywell T3 Thermostat

Users often ask about the Honeywell T3’s installation process‚ energy-saving features‚ and troubleshooting tips. Many seek clarity on custom heating schedules and wireless communication issues. Additionally‚ inquiries about resetting the thermostat to factory settings and understanding manual versus auto modes are frequent. Some also ask about compatibility with their heating systems and how to optimize performance for energy efficiency. These questions highlight the need for clear guidance in the manual to ensure smooth operation and user satisfaction.

Tips for Optimal Performance and Energy Efficiency

For optimal performance‚ utilize the Honeywell T3’s energy-saving settings and customizable schedules. Regularly update your heating preferences to align with seasonal changes. Ensure the thermostat is clean and free from dust for accurate temperature readings. Replace air filters as recommended to maintain efficiency. Use the optimization functions to learn your heating patterns and reduce energy waste. Additionally‚ schedule regular software updates to benefit from the latest features and improvements. These practices ensure maximum energy efficiency and comfort year-round.

The Honeywell T3 Thermostat Manual PDF is essential for maximizing efficiency and comfort‚ providing clear guidance for installation‚ operation‚ and troubleshooting‚ ensuring optimal energy savings and performance.

Final Thoughts on the Honeywell T3 Thermostat Manual

The Honeywell T3 Thermostat Manual is a key resource for users‚ offering comprehensive guidance on installation‚ operation‚ and troubleshooting. It ensures users can fully utilize the thermostat’s energy-saving features and customizable settings. The manual’s clear instructions and detailed sections on compatibility‚ maintenance‚ and advanced configurations make it an invaluable tool for optimizing comfort and energy efficiency. Whether you’re a new or experienced user‚ this manual is essential for unlocking the Honeywell T3’s full potential.

Continue Reading